九、Python、机器学习和深度学习实战
1 环境搭建
区分几个小白容易混淆的概念:pycharm,python解释器,conda安装,pip安装,总结来说:
pycharm是python开发的集成开发环境(Integrated Development Environment,简称IDE),它本身无法执行Python代码python解释器才是真正执行代码的工具,pycharm里可设置Python解释器,一般去python官网下载python3.7或python3.8版本;如果安装过anaconda,它里面必然也包括一个某版本的Python解释器;pycharm配置python解释器选择哪一个都可以。- anaconda是python常用包的合集,并提供给我们使用
conda命令非常方便的安装各种Python包。 conda安装:我们安装过anaconda软件后,就能够使用conda命令下载anaconda源里(比如中科大镜像源)的包pip安装:类似于conda安装的python安装包的方法,更加全面
修改镜像源
在使用安装conda 安装某些包会出现慢或安装失败问题,最有效方法是修改镜像源为国内镜像源。之前都选用清华镜像源,但是2019年后已停止服务。推荐选用中科大镜像源。
先查看已经安装过的镜像源,cmd窗口执行命令:
conda config --show
查看配置项channels,如果显示带有tsinghua,则说明已安装过清华镜像。
channels:
- https://mirrors.tuna.tsinghua.edu.cn/tensorflow/linux/cpu/
- https://mirrors.tuna.tsinghua.edu.cn/anaconda/cloud/msys2/
- https://mirrors.tuna.tsinghua.edu.cn/anaconda/cloud/conda-forge/
- https://mirrors.tuna.tsinghua.edu.cn/anaconda/pkgs/free/
- https://mirrors.tuna.tsinghua.edu.cn/anaconda/cloud/pytorch/
下一步,使用conda config --remove channels url地址删除清华镜像,如下命令删除第一个。然后,依次删除所有镜像源
conda config --remove channels https://mirrors.tuna.tsinghua.edu.cn/tensorflow/linux/cpu/
添加目前可用的中科大镜像源:
conda config --add channels https://mirrors.ustc.edu.cn/anaconda/pkgs/free/
并设置搜索时显示通道地址:
conda config --set show_channel_urls yes
确认是否安装镜像源成功,执行conda config --show,找到channels值为如下:
channels:
  - https://mirrors.ustc.edu.cn/anaconda/pkgs/free/
  - defaults
Done~
2 pytorch慢到无法安装,怎么办?
1 安装慢到装不上
最近几天,后台几个小伙伴问我,无论pip还是conda安装pytorch都太慢了,都是安装官方文档去做的,就是超时装不上,无法开展下一步,卡脖子的感觉太不好受。
这些小伙伴按照pytorch官档提示,选择好后,完整复制上面命令conda install pytorch torchvision cudatoolkit=10.1 -c pytorch到cmd中,系统是windows.

接下来提示,conda需要安装的包,他们操作选择y,继续安装,但是在安装时,发现进度条几乎一动不动。
反复尝试,就是这样,有些无奈,还感叹怎么深度学习的路一开始就TMD的这么难!
2 这样能正常安装
无论是安装cpu版还是cuda版,网上关于这些的参考资料太多了,无非就是cuda硬件和cuda开发包的版本要对应,python版本要对应等,这些bee君觉得都不是事。
就像几位读者朋友遇到的问题,关键还是如何解决慢到无法装的问题。
最有效方法是添加镜像源,常见的清华或中科大。
先查看是否已经安装相关镜像源,windows系统在cmd窗口中执行命令:
conda config --show
bee君这里显示:
channels:
  - https://mirrors.tuna.tsinghua.edu.cn/anaconda/cloud/pytorch/
  - https://mirrors.tuna.tsinghua.edu.cn/anaconda/cloud/menpo/
  - https://mirrors.tuna.tsinghua.edu.cn/anaconda/cloud/bioconda/
  - https://mirrors.tuna.tsinghua.edu.cn/anaconda/cloud/msys2/
  - https://mirrors.tuna.tsinghua.edu.cn/anaconda/cloud/conda-forge/
  - https://mirrors.tuna.tsinghua.edu.cn/anaconda/pkgs/main/
  - https://mirrors.tuna.tsinghua.edu.cn/anaconda/pkgs/free/
说明已经安装好清华的镜像源。如果没有安装,请参考下面命令安装源:
conda config --add channels https://mirrors.tuna.tsinghua.edu.cn/anaconda/cloud/pytorch/
依次安装上面所有的源。
并设置搜索时显示通道地址,执行下面命令:
conda config --set show_channel_urls yes
3 最关键一步
有的读者问我,他们已经都安装好镜像源,但是为什么安装还是龟速?问他们,是用哪个命令,他们回复:conda install pytorch torchvision cudatoolkit=10.1 -c pytorch
好吧,执行上面命令,因为命令最后是-c pytorch,所以默认还是从conda源下载,新安装的清华等源没有用上。
正确命令:conda install pytorch torchvision cudatoolkit=10.1,也就是去掉-c pytorch
并且在安装时,也能看到使用了清华源。并且安装速度直线提升,顺利done
4 测试是否安装成功
结合官档,执行下面代码,torch.cuda.is_available()返回True,说明安装cuda成功。
In [1]: import torch

In [2]: torch.cuda
Out[2]: <module 'torch.cuda' from 'D:\\Programs\\anaconda\\lib\\site-packages\\torch\\cuda\\__init__.py'>

In [3]: torch.cuda.is_available()
Out[3]: True

In [4]: from __future__ import print_function

In [5]: x = torch.rand(5,3)

In [6]: print(x)
tensor([[0.0604, 0.1135, 0.2656],
        [0.5353, 0.9246, 0.3004],
        [0.4872, 0.9592, 0.2215],
        [0.2598, 0.5031, 0.6093],
        [0.2986, 0.1599, 0.5862]])
这篇文章主要讨论安装pytorch慢到不能装的问题及方案,希望对读者朋友们有帮助。
3 自动群发邮件
Python自动群发邮件
import smtplib
from email import (header)
from email.mime import (text, application, multipart)
import time
def sender_mail():
smt_p = smtplib.SMTP()
smt_p.connect(host='smtp.qq.com', port=25)
sender, password = '113097485@qq.com', "**************"
smt_p.login(sender, password)
receiver_addresses, count_num = [
'guozhennianhua@163.com', 'xiaoxiazi99@163.com'], 1
for email_address in receiver_addresses:
try:
msg = multipart.MIMEMultipart()
msg['From'] = "zhenguo"
msg['To'] = email_address
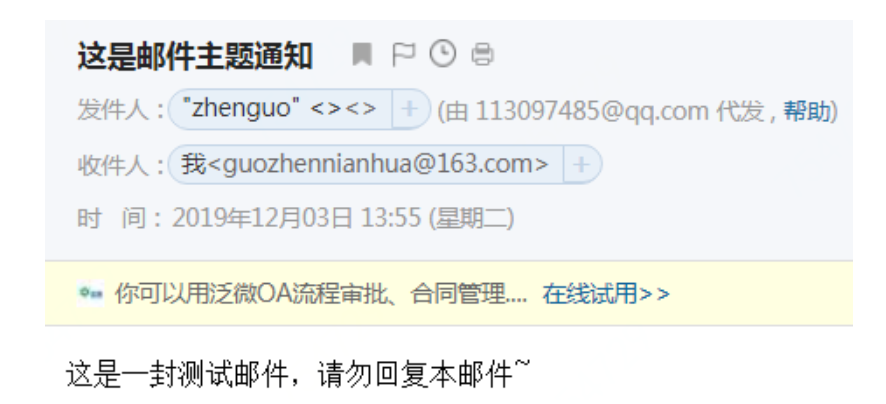
msg['subject'] = header.Header('这是邮件主题通知', 'utf-8')
msg.attach(text.MIMEText(
'这是一封测试邮件,请勿回复本邮件~', 'plain', 'utf-8'))
smt_p.sendmail(sender, email_address, msg.as_string())
time.sleep(10)
print('第%d次发送给%s' % (count_num, email_address))
count_num = count_num + 1
except Exception as e:
print('第%d次给%s发送邮件异常' % (count_num, email_address))
continue
smt_p.quit()
sender_mail()
注意:
发送邮箱是qq邮箱,所以要在qq邮箱中设置开启SMTP服务,设置完成时会生成一个授权码,将这个授权码赋值给文中的password变量。
发送后的截图:
4 二分搜索
二分搜索是程序员必备的算法,无论什么场合,都要非常熟练地写出来。
小例子描述:
在有序数组arr中,指定区间[left,right]范围内,查找元素x
如果不存在,返回-1
二分搜索binarySearch实现的主逻辑
def binarySearch(arr, left, right, x):
    while left <= right:

        mid = int(left + (right - left) / 2); # 找到中间位置。求中点写成(left+right)/2更容易溢出,所以不建议这样写

        # 检查x是否出现在位置mid
        if arr[mid] == x:
            print('found %d 在索引位置%d 处' %(x,mid))
            return mid

            # 假如x更大,则不可能出现在左半部分
        elif arr[mid] < x:
            left = mid + 1 #搜索区间变为[mid+1,right]
            print('区间缩小为[%d,%d]' %(mid+1,right))

        # 同理,假如x更小,则不可能出现在右半部分
        elif x<arr[mid]:
            right = mid - 1 #搜索区间变为[left,mid-1]
            print('区间缩小为[%d,%d]' %(left,mid-1))

    # 假如搜索到这里,表明x未出现在[left,right]中
    return -1
在Ipython交互界面中,调用binarySearch的小Demo:
In [8]: binarySearch([4,5,6,7,10,20,100],0,6,5)
区间缩小为[0,2]
found 5 at 1
Out[8]: 1

In [9]: binarySearch([4,5,6,7,10,20,100],0,6,4)
区间缩小为[0,2]
区间缩小为[0,0]
found 4 at 0
Out[9]: 0

In [10]: binarySearch([4,5,6,7,10,20,100],0,6,20)
区间缩小为[4,6]
found 20 at 5
Out[10]: 5

In [11]: binarySearch([4,5,6,7,10,20,100],0,6,100)
区间缩小为[4,6]
区间缩小为[6,6]
found 100 at 6
Out[11]: 6
5 爬取天气数据并解析温度值
爬取天气数据并解析温度值
素材来自朋友袁绍,感谢!
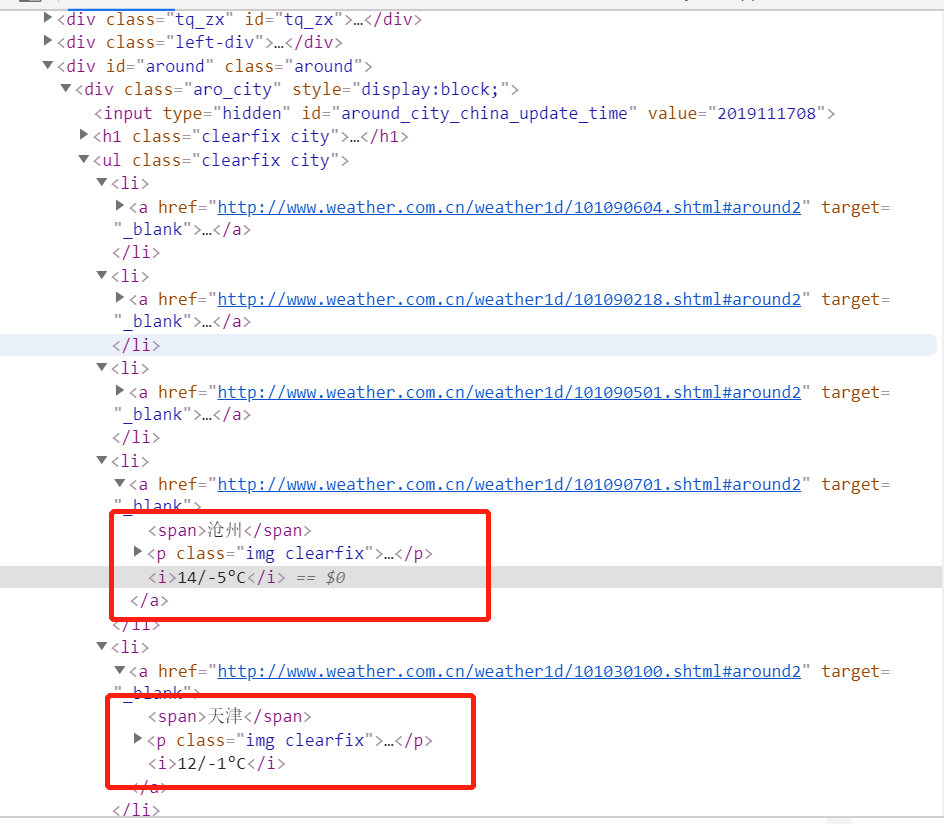
爬取的html 结构
import requests
from lxml import etree
import pandas as pd
import re

url = 'http://www.weather.com.cn/weather1d/101010100.shtml#input'
with requests.get(url) as res:
    content = res.content
    html = etree.HTML(content)
通过lxml模块提取值
lxml比beautifulsoup解析在某些场合更高效
location = html.xpath('//*[@id="around"]//a[@target="_blank"]/span/text()')
temperature = html.xpath('//*[@id="around"]/div/ul/li/a/i/text()')
结果:
['香河', '涿州', '唐山', '沧州', '天津', '廊坊', '太原', '石家庄', '涿鹿', '张家口', '保定', '三河', '北京孔庙', '北京国子监', '中国地质博物馆', '月坛公
园', '明城墙遗址公园', '北京市规划展览馆', '什刹海', '南锣鼓巷', '天坛公园', '北海公园', '景山公园', '北京海洋馆']

['11/-5°C', '14/-5°C', '12/-6°C', '12/-5°C', '11/-1°C', '11/-5°C', '8/-7°C', '13/-2°C', '8/-6°C', '5/-9°C', '14/-6°C', '11/-4°C', '13/-3°C'
, '13/-3°C', '12/-3°C', '12/-3°C', '13/-3°C', '12/-2°C', '12/-3°C', '13/-3°C', '12/-2°C', '12/-2°C', '12/-2°C', '12/-3°C']
构造DataFrame对象
df = pd.DataFrame({'location':location, 'temperature':temperature})
print('温度列')
print(df['temperature'])
正则解析温度值
df['high'] = df['temperature'].apply(lambda x: int(re.match('(-?[0-9]*?)/-?[0-9]*?°C', x).group(1) ) )
df['low'] = df['temperature'].apply(lambda x: int(re.match('-?[0-9]*?/(-?[0-9]*?)°C', x).group(1) ) )
print(df)
详细说明子字符创捕获
除了简单地判断是否匹配之外,正则表达式还有提取子串的强大功能。用()表示的就是要提取的分组(group)。比如:^(\d{3})-(\d{3,8})$分别定义了两个组,可以直接从匹配的字符串中提取出区号和本地号码
m = re.match(r'^(\d{3})-(\d{3,8})$', '010-12345')
print(m.group(0))
print(m.group(1))
print(m.group(2))

# 010-12345
# 010
# 12345
如果正则表达式中定义了组,就可以在Match对象上用group()方法提取出子串来。
注意到group(0)永远是原始字符串,group(1)、group(2)……表示第1、2、……个子串。
最终结果
Name: temperature, dtype: object
    location temperature  high  low
0         香河     11/-5°C    11   -5
1         涿州     14/-5°C    14   -5
2         唐山     12/-6°C    12   -6
3         沧州     12/-5°C    12   -5
4         天津     11/-1°C    11   -1
5         廊坊     11/-5°C    11   -5
6         太原      8/-7°C     8   -7
7        石家庄     13/-2°C    13   -2
8         涿鹿      8/-6°C     8   -6
9        张家口      5/-9°C     5   -9
10        保定     14/-6°C    14   -6
11        三河     11/-4°C    11   -4
12      北京孔庙     13/-3°C    13   -3
13     北京国子监     13/-3°C    13   -3
14   中国地质博物馆     12/-3°C    12   -3
15      月坛公园     12/-3°C    12   -3
16   明城墙遗址公园     13/-3°C    13   -3
17  北京市规划展览馆     12/-2°C    12   -2
18       什刹海     12/-3°C    12   -3
19      南锣鼓巷     13/-3°C    13   -3
20      天坛公园     12/-2°C    12   -2
21      北海公园     12/-2°C    12   -2
22      景山公园     12/-2°C    12   -2
23     北京海洋馆     12/-3°C    12   -3
6 制作小而美的计算器
1) ui设计
使用qt designer ,按装anaconda后,在如下路径找到:
conda3.05\Library\bin
designer.exe文件,双击启动:
![1578811899182]./img/1578811899182.png)
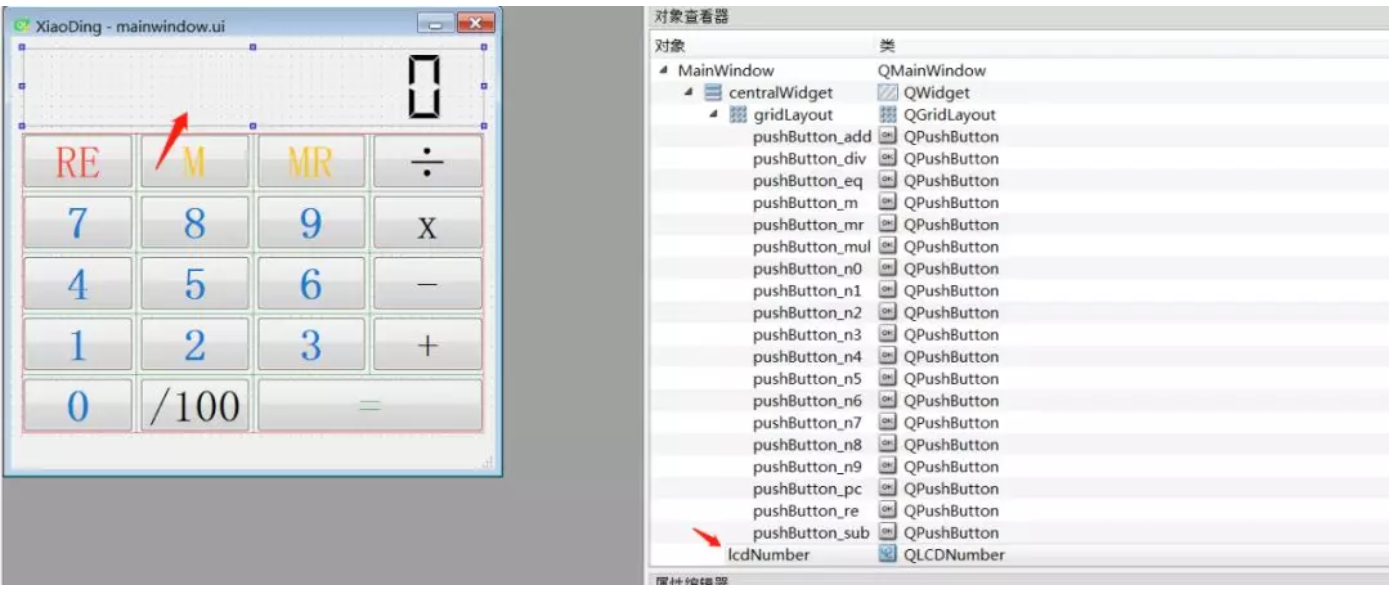
创建窗体,命名为XiaoDing,整个的界面如下所示:
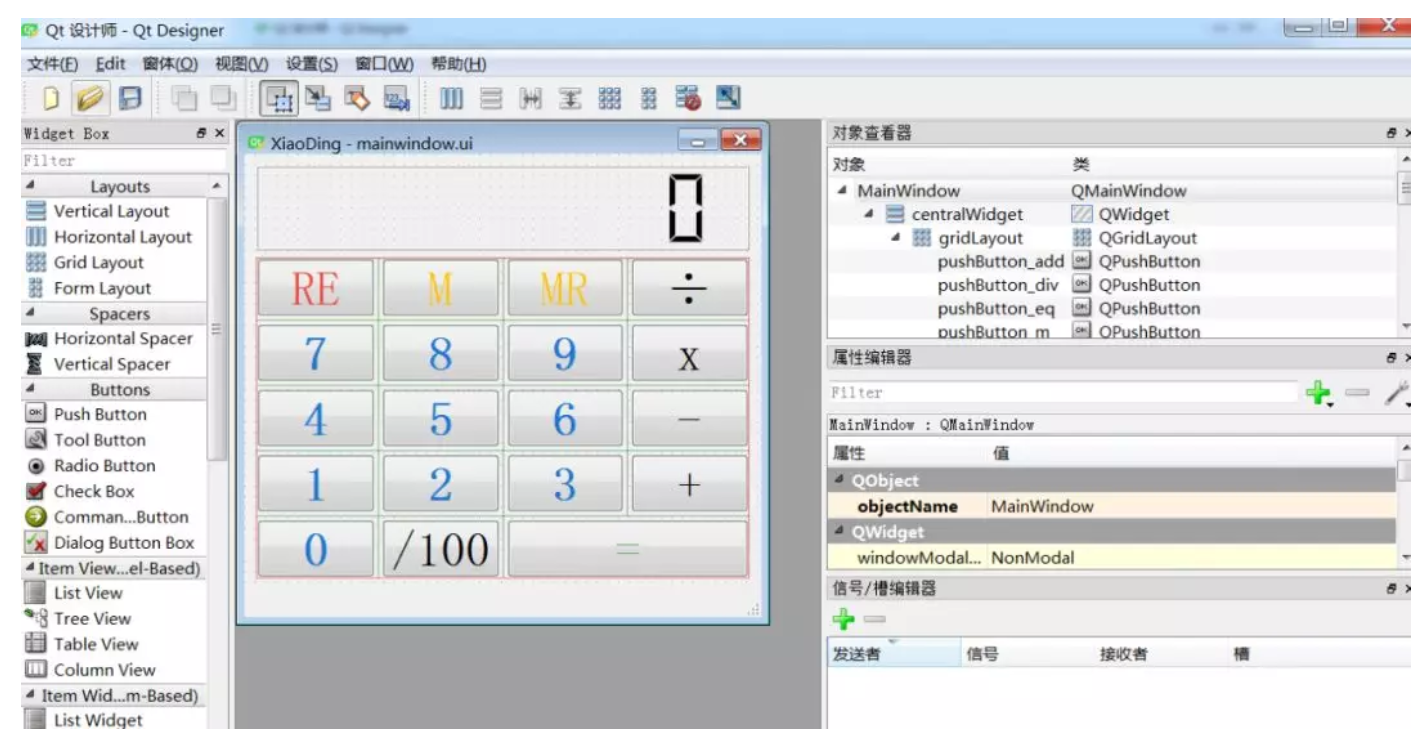
qt 设计器提供的常用控件基本都能满足开发需求,通过拖动左侧的控件,很便捷的就能搭建出如下的UI界面,比传统的手写控件代码要方便很多。
最终设计的计算器XiaoDing界面如下,
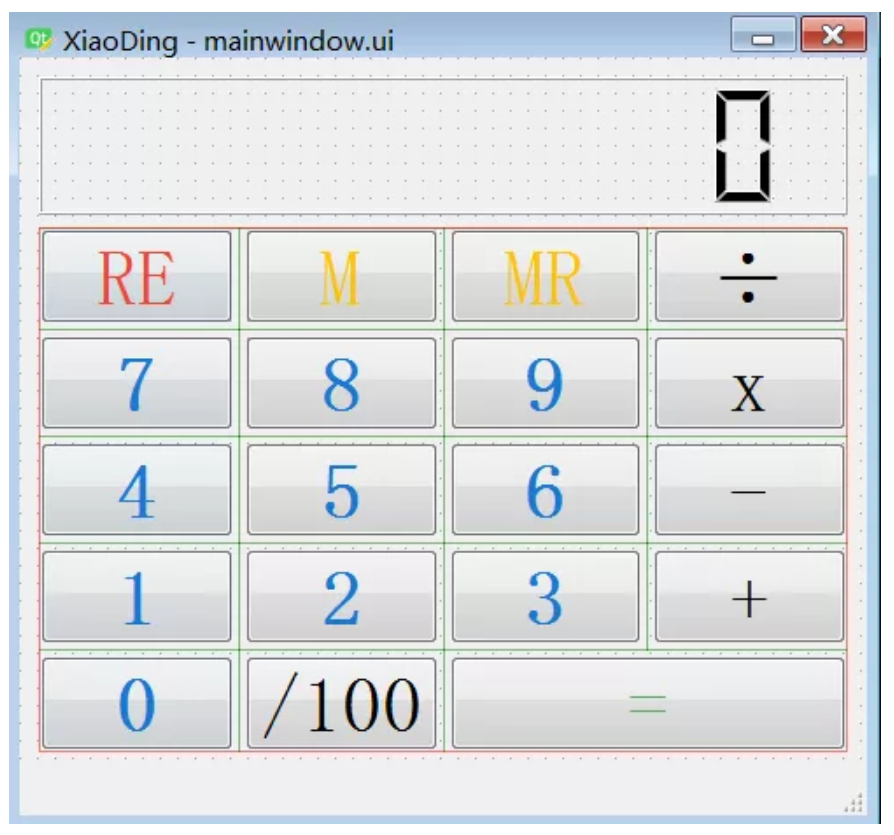
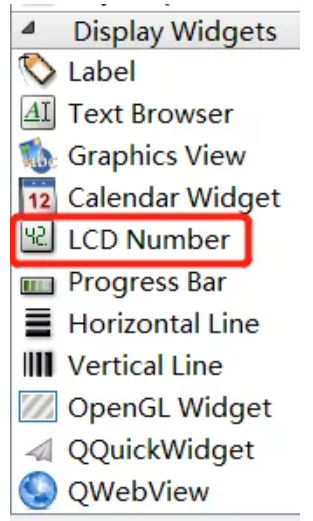
比如,其中一个用于计算器显示的对象:lcdNumber,对象的类型为:LCD Number。右侧为计算器中用到的所有对象。
2) 转py文件
使用如下命令,将设计好的ui文件转为py文件:
pyuic5 -o ./calculator/MainWindow.py ./calculator/mainwindow.ui
3) 计算器实现逻辑
导入库:
from PyQt5.QtGui import *
from PyQt5.QtWidgets import *
from PyQt5.QtCore import *

import operator

from MainWindow import Ui_MainWindow
主题代码逻辑很精简:
# Calculator state.
READY = 0
INPUT = 1


class MainWindow(QMainWindow, Ui_MainWindow):
    def __init__(self, *args, **kwargs):
        super(MainWindow, self).__init__(*args, **kwargs)
        self.setupUi(self)

        # Setup numbers.
        for n in range(0, 10):
            getattr(self, 'pushButton_n%s' % n).pressed.connect(lambda v=n: self.input_number(v))

        # Setup operations.
        self.pushButton_add.pressed.connect(lambda: self.operation(operator.add))
        self.pushButton_sub.pressed.connect(lambda: self.operation(operator.sub))
        self.pushButton_mul.pressed.connect(lambda: self.operation(operator.mul))
        self.pushButton_div.pressed.connect(lambda: self.operation(operator.truediv))  # operator.div for Python2.7

        self.pushButton_pc.pressed.connect(self.operation_pc)
        self.pushButton_eq.pressed.connect(self.equals)

        # Setup actions
        self.actionReset.triggered.connect(self.reset)
        self.pushButton_ac.pressed.connect(self.reset)

        self.actionExit.triggered.connect(self.close)

        self.pushButton_m.pressed.connect(self.memory_store)
        self.pushButton_mr.pressed.connect(self.memory_recall)

        self.memory = 0
        self.reset()

        self.show()
基础方法:
    def input_number(self, v):
        if self.state == READY:
            self.state = INPUT
            self.stack[-1] = v
        else:
            self.stack[-1] = self.stack[-1] * 10 + v

        self.display()

    def display(self):
        self.lcdNumber.display(self.stack[-1])
按钮RE,M, RE对应的实现逻辑:
    def reset(self):
        self.state = READY
        self.stack = [0]
        self.last_operation = None
        self.current_op = None
        self.display()

    def memory_store(self):
        self.memory = self.lcdNumber.value()

    def memory_recall(self):
        self.state = INPUT
        self.stack[-1] = self.memory
        self.display()
+,-,x,/,/100对应实现方法:
def operation(self, op):
        if self.current_op:  # Complete the current operation
            self.equals()

        self.stack.append(0)
        self.state = INPUT
        self.current_op = op

    def operation_pc(self):
        self.state = INPUT
        self.stack[-1] *= 0.01
        self.display()
=号对应的方法实现:
 def equals(self):
        if self.state == READY and self.last_operation:
            s, self.current_op = self.last_operation
            self.stack.append(s)

        if self.current_op:
            self.last_operation = self.stack[-1], self.current_op

            try:
                self.stack = [self.current_op(*self.stack)]
            except Exception:
                self.lcdNumber.display('Err')
                self.stack = [0]
            else:
                self.current_op = None
                self.state = READY
                self.display()
main函数:
if __name__ == '__main__':
    app = QApplication([])
    app.setApplicationName("XiaoDing")

    window = MainWindow()
    app.exec_()
